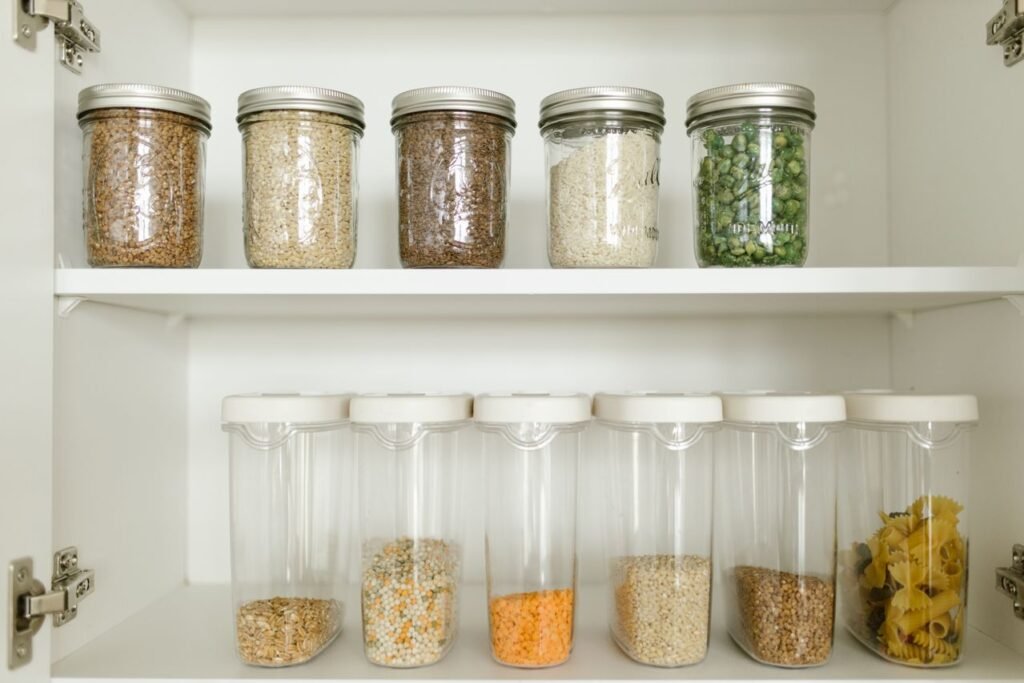
Organizing a small kitchen pantry isn’t just about making it look pretty—it is about maximizing functional real estate so cooking remains fast and stress-free. When square footage is tight, smart organization prevents duplicate purchases, reduces food waste, and doubles your usable storage space.
Here is a step-by-step blueprint to transform a small or cramped pantry into an efficient storage system.
1. The Reset: Empty, Audit, and Clean
Before buying bins or rearranging items, you need a clean slate.
2. Decant into Clear, Stackable Containers
Bulky cardboard boxes and half-empty bags consume excessive space and create visual clutter.
-
Switch to Clear Containers: Decanting dry goods (flour, sugar, rice, pasta, oats) into clear airtight containers lets you instantly see inventory levels while keeping food fresh.
-
Choose Uniform Shapes: Square or rectangular containers stack neatly and leave zero dead space, unlike round containers which waste corner areas.
-
Label Everything: Use chalk markers, printed labels, or masking tape to mark item names and cooking times or expiration dates on the back.
3. Leverage Vertical Space and Unused Areas
In a small pantry, height is your best asset. If your shelves are spaced far apart, utilize vertical storage hacks to double capacity.


-
Tiered Shelf Risers: Install 3-tier risers for canned goods, spices, or jars so items in the back remain visible.
-
Under-Shelf Wire Baskets: Slide clip-on wire baskets onto existing shelves to utilize the empty air space directly underneath.
-
Over-the-Door Organizers: Hang a clear pocket or metal rack organizer on the inside of the pantry door to hold spices, foil rolls, small snack bags, or oil bottles.
-
Lazy Susans (Turntables): Place turntables in deep corners or top shelves to easily reach oils, vinegars, and sauces without knocking over other items.
4. Map Out Strategic Zones
Assign specific shelf heights based on item usage frequency:
| Pantry Level | What to Store | Why It Works |
| Top Shelves | Backstock, bulk refills, special occasion cookware, light paper goods | Keeps seldom-used items out of the way. |
| Eye-Level / Middle Shelves | Daily essentials: dinner ingredients, grains, oils, frequently used spices | Quickest access for meal preparation. |
| Lower Shelves | Grab-and-go snacks, breakfast cereals, kids’ snacks | Easy to reach for family members without mess. |
| Floor / Bottom Shelf | Heavy items: potatoes, onions, water, heavy appliances, pet food | Prevents heavy lifting and keeps weight low. |
5. Maintenance Habits to Keep It Organized
An organized pantry stays that way only with a few quick maintenance rules:
-
Practice First-In, First-Out (FIFO): Place newly bought groceries behind older items so older stock gets used before expiring.
-
Use a “Grab-and-Go” Snack Bin: Unbox individually wrapped snacks into an open bin for easy grabbing.
-
Do a 5-Minute Monthly Check: Review shelves once a month before major grocery trips to wipe down spills and restock decanted containers.